Wondering how to set up an affiliate program in WordPress?
Setting up an affiliate program is one of the easiest ways to encourage people to promote your products. People can promote your product on their website and when someone makes a purchase through their referral, the promoters earn a commission.
The role of an affiliate program is to track referral sales and commissions.
Why Add an Affiliate Program to Promote Your Products
No matter what you sell online, setting up an affiliate program is one of the easiest ways to promote your products. By adding an affiliate program, you get a chance to promote your business via referrals and it also enables you to reach out to thousands of people without putting much effort.
For example, if a blogger signs up for your program that has 10,000 subscribers, it means that by allowing them to promote your business on their site and social profiles, you’re actually reaching out to 10,000 people all at once. Best of all, you only have to pay them when their users make a purchase on your site.
So the more affiliates you attract the more people you reach out to without really spending tons of extra money on advertising and marketing your business.
It’s basically a revenue-sharing business which is a win-win situation for both you and the ones who sign up for your affiliate program. Now that you know what affiliate program is all about, let’s take a look at how to add an affiliate program to your WooCommerce website.
How to Add an Affiliate Program to Your WordPress Website
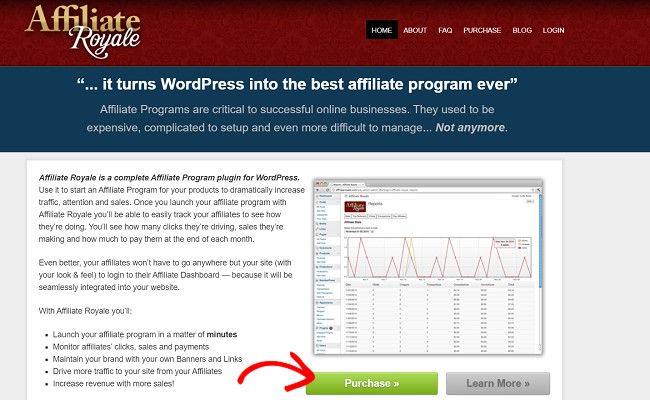
Adding an affiliate program to your WordPress website can be easy if you use the right plugin. Affiliate Royale is one such plugin that we recommend to all our users.
With this plugin, it’s so much easier to start your affiliate program without having to go through any complicated and time-consuming process. It is a complete solution for anyone who wants to start an affiliate program to promote their business.
Affiliate Royale is an affiliate network management software that lets you monitor and track all your affiliate click, sales and payments right from your website. Not only does it allow users to join your program from your website, but it also lets you save fees that you would otherwise pay to a third-party affiliate network.
You can start using it on single or multiple websites by purchasing it that requires just a one-time payment.
Step 1: Installing Affiliate Royale on Your WordPress Site
Installing Affiliate Royale on your WordPress site is just like installing any other plugin. You’ll first have to go to its official website and then download the plugin by making the payment ($85 for the merchant edition).
Once the software is downloaded, go to your website dashboard and click on Plugins » Add New » Upload. Now upload the software that you have just downloaded and click on the Activate button to make it start working. You’ll now have a user-friendly dashboard where you can start creating the login pages for your users.
Step 2: Creating Your Affiliate Pages
Once you’ve activated the plugin, Affiliate Royale will automatically let you create 3 different types of pages. A page through which users can
- sign up for your affiliate program
- log into their dashboard
- manage their affiliates links
To create these pages start by logging in to your Affiliate Royale dashboard. Now click on the Affiliate Royale option » Affiliate Program pages. You’ll see the following options on your screen.
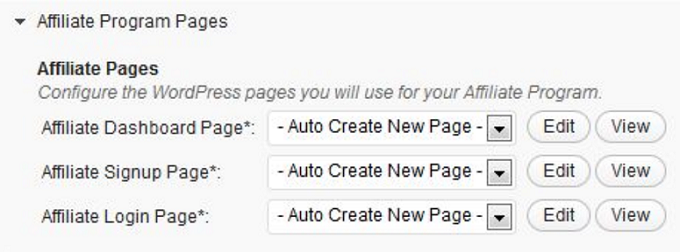
From the dropdown arrow, select the auto-create new page option. Upon selecting this option Affiliate Royale will automatically create the pages for you. You can also use your own page. For that, you’ll first have to create your page.
This can be done by going to Pages » Add New on your WordPress dashboard. Then go ahead and save your page. After saving the page you can use it by selecting the particular page from the dropdown arrow.
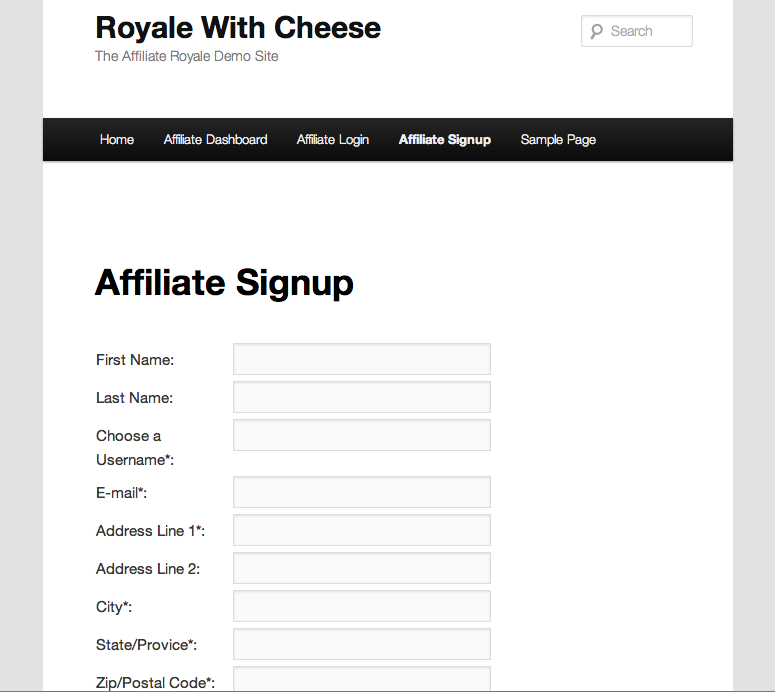
Once done just save your settings. Your settings will automatically be changed to something like this:
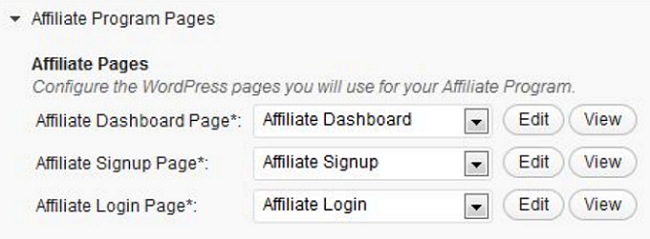
In the signup page, you can add fields for letting your user sign up for your program.
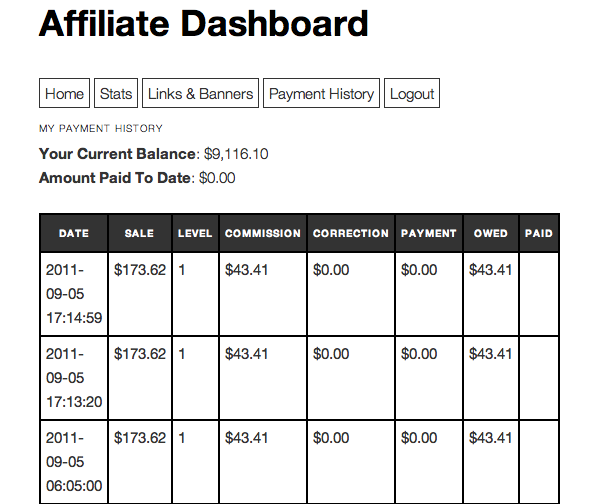
In the affiliate management dashboard, your users can easily monitor their stats, edit their account information, download their links & banners and view their payment history, etc.
Step 3: Setting up Commission Levels
The next step is to add the commission level. Commission levels allow you to create varying percentages paid to affiliates and parent-affiliates. It encourages your affiliates to promote your affiliate program.
To add this percentage, you’ll find the option below the option to add your pages. Click on the Commission Settings option. Under that, you’ll see another option called Level.
To make it simple to understand, let’s say affiliate A refers a new affiliate, Affiliate B where affiliate A is the parent affiliate of affiliate B. And suppose you have set two different commission levels:
- Level 1 = 10%
- Level 2 = 5%
Now when a sale is made through Affiliate A, Affiliate A get’s 10% of the sale and Affiliate B gets nothing. When a sale is made through Affiliate B, Affiliate B gets 10% and Affiliate A gets 5%.
So depending on the commission you want to allot, add your levels and define the commission in the field next to it.
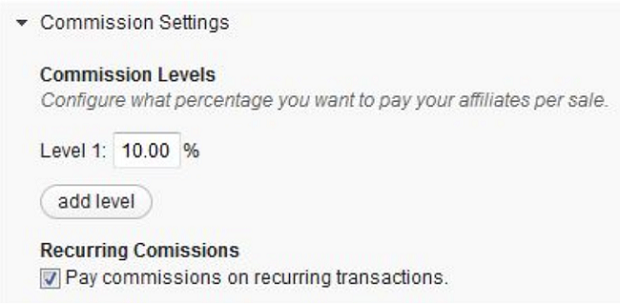
To add more levels, just click on the Add level button. You’ll also see another option called strong>Recurring Commissions.
Only enable this option if your product or service needs a subscription. In that case, your affiliate will continue getting their share of commission every time a user renews the subscription. You should keep this option disabled if your product is available for a one-time purchase.
Step 4: Creating Links and Banners for Your Affiliates
The next step is to create links and banners for your affiliates. These are used by your affiliate to promote your product or service. When a user signs up for your affiliate program, they can see these links and banners on their dashboard. Generally, Affiliate Royale doesn’t need you to create these links manually. You can simply use the default link that it creates for you.
It appears on the top of each tab in the Affiliate Dashboard. It appears something like this:

But if you want to create a custom link, that’s possible too. You can create this link right from your Affiliate Royale dashboard by scrolling a little downwards on the same page where you created the above options. You’ll see the following options.
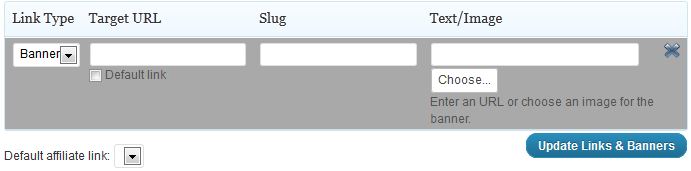
Under the first option, select Text or Banner by clicking on the dropdown menu. If you choose Text then the Upload form in the Text/Image column will automatically change into a Text field. Under the Target URL, add the link to your Product page. This is where your end users will land when an affiliate directs them to your site.
The next option is the slug. This is the term or word you want to add at the end of your link. For example in this URL http://example.com/affiliatename/xyz/, xyz is the slug.
The last option is the Text/Image option. This might vary based on the option you choose under the link type you choose. If you select the text, then you won’t be able to upload an image. Rather, you can add text to it. If you want to upload an image, select the Banner option.
Just below this option, you’ll find another option called the Default Affiliate Link. Check this box if you want this custom link to be your default link. It will then replace the default link on the top of your dashboard tabs.
Step 5: Integrating Payment Options
The next step is to set up payment options. Affiliate Royale supports and integrates with various payment options like PayPal, WishList Member, Shopp, Cart66, Authorize.net ARB, WP E-Commerce, JigoShop, MarketPress, Easy Digital Downloads, etc.
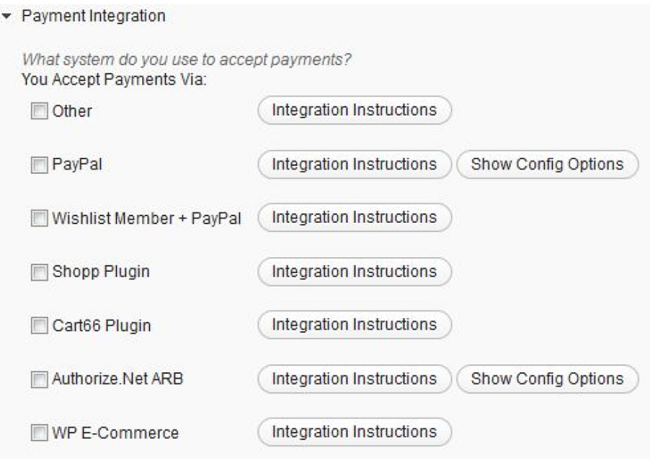
Depending on your preferred option, you can select one by checking the box next to it. You don’t have to go through any extra set up process to get started with most of these options. The plugin automatically takes care of it. So you can get started right away.
So that’s it. Isn’t it easy to add affiliate programs with Affiliate Royale? We hope this article was helpful to you. If you want to know how to get started with an online store, click here.
The post How to Add an Affiliate Program in WordPress (Step by Step) appeared first on IsItWP – WordPress Technology Lookup Tool.
Post courtesy of IsItWP Read thefull post >>
Author: Editorial Team